This comprehensive guide should be followed to seamlessly install, configure, and troubleshoot the Quivers Plugin for Shopware 6. It provides step-by-step instructions, starting from prerequisites and installation to detailed configuration settings for both Quivers and Stripe. Additionally, it includes troubleshooting tips to address common issues, ensuring a smooth setup process for your ecommerce platform.
Table of Contents
- Prerequisites
- Installation
- Configuration
- Quivers Settings
- Stripe Configuration
- Troubleshooting
Prerequisites
Before you begin, ensure you have the following:
- Quivers Integration Extension Package
- Please reach out to support@quivers.com if you have not received the zip file.
- Details provided by Quivers:
- Quivers API key
- Business RefId
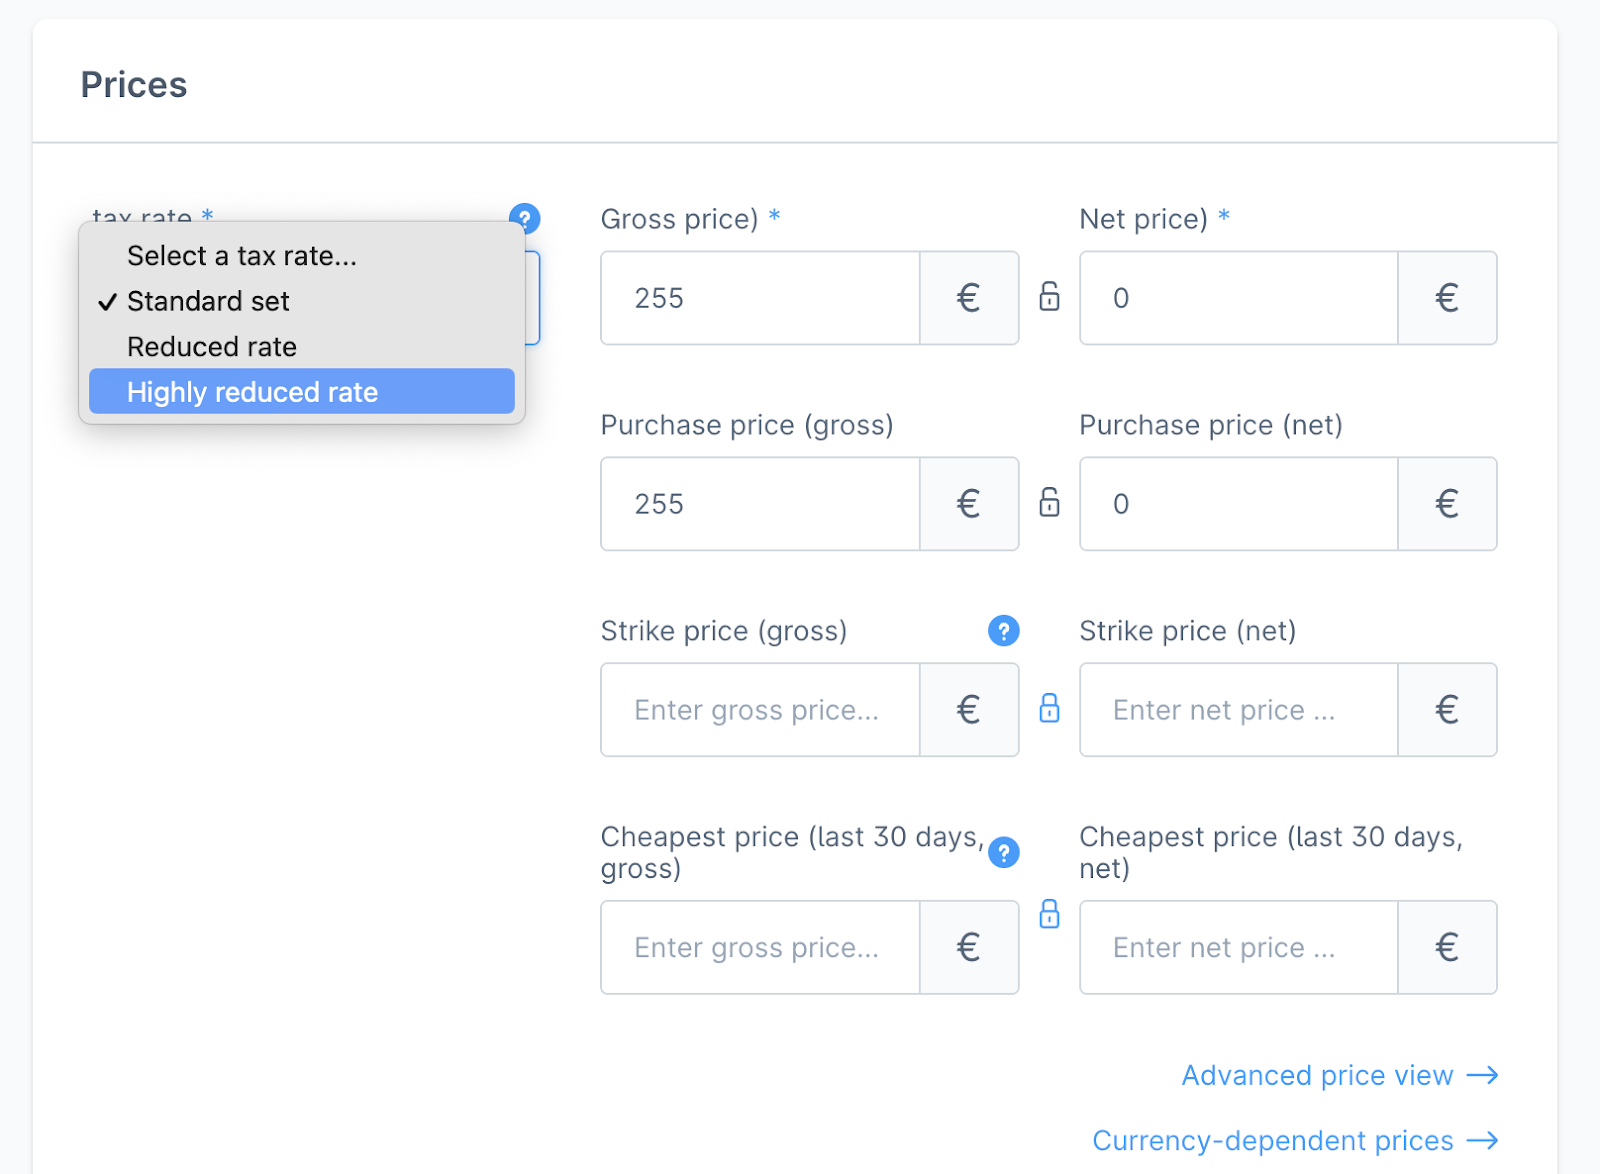
- Disable all tax configurations (Quivers extension will manage taxes)
Steps to update tax configurations:
- Navigate to Catalogs → Products.
- Select the product you want to edit.
- Scroll down to the Prices section.
- Set the Tax rate to Highly Reduced.
- Click Save.
Installation
Steps to install the Quivers Plugin:
- Login to your Shopware account as an administrator.
- Navigate to Extensions → My Extensions.
- Click on Upload Extension and upload the Quivers Integration Extension Package shared with you.
- Install and Activate the Plugin.
Configuration
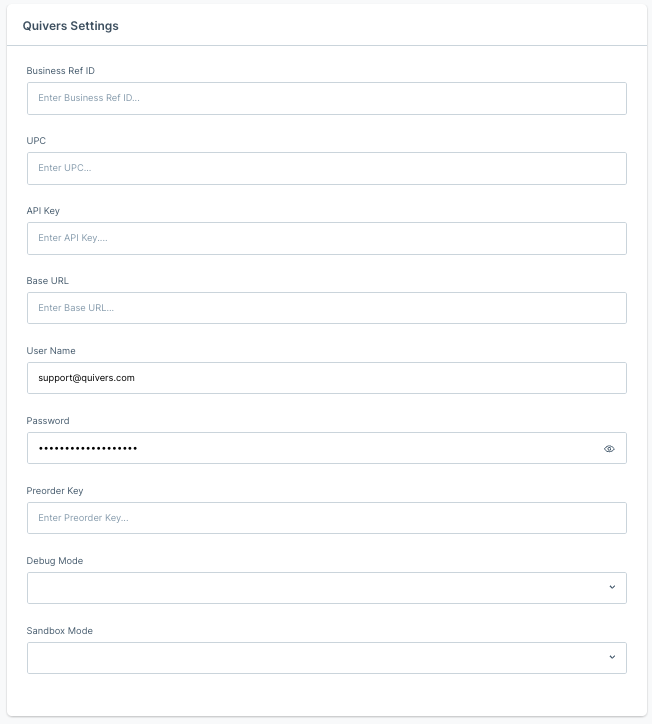
Configure Quivers Settings
- Go to the Sales Channel tab in the sidebar.
- Select your Sales Channel.
- Go to the General tab.
- Navigate to Quivers Settings.
- Enter the following details:
- Business RefId: Provided by your Quivers project manager.
- Shopware Base URL: Enter the base URL of your Shopware site.
- API Key: Provided by Quivers.
- Shopware Admin Username and Password: Used for API authentications.
- Preorder Key: Your predefined key.
- Set the following:
- Quivers Sandbox Enabled: Set to 'Yes' for test environment.
- Quivers Debug Mode: Set to 'No'.
- Click Save.
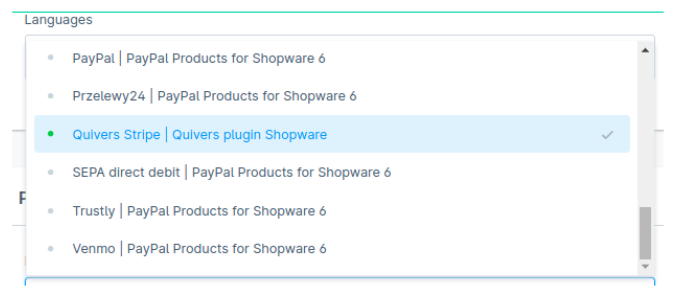
Configure Stripe
- Go to the Sales Channel tab in the sidebar.
- Select your Sales Channel.
- Go to the General tab.
- Navigate to Quivers Settings.
- Scroll down to the Payment and Shipping section.
- Select Quivers Stripe from the dropdown.
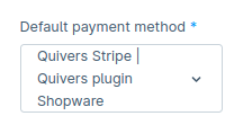
- Optionally, set it as the default payment method in the Default Payment Options dropdown.
- Click Save.
Troubleshooting
Common Issues and Solutions:
- Quivers Plugin Configuration Issues
-
- Ensure all data points are valid and correct.
- Verify that all fields have values.
- Stripe Payment UI Issues
- Ensure Quivers settings are saved and all values are valid.
By following these steps, you should be able to install and configure the Quivers Plugin on Shopware 6 without any issues. For further assistance, refer to the official Quivers support resources or contact support@quivers.com.