Adding Products to Your Storefront
Before products can be sold, they will need to be added to your Storefront. Before adding a product to the Storefront, make sure the following is complete:
Product details have been added
Product options have been configured (if applicable)
Product added to shipping policy
Product added to claiming group
1. Click "Marketplaces" from the left-hand Quivers menu.
2. Select "Templates" from the Marketplace sub-menu.
3. Open the template by selecting the pencil icon on the far right side next to the template you wish to edit.

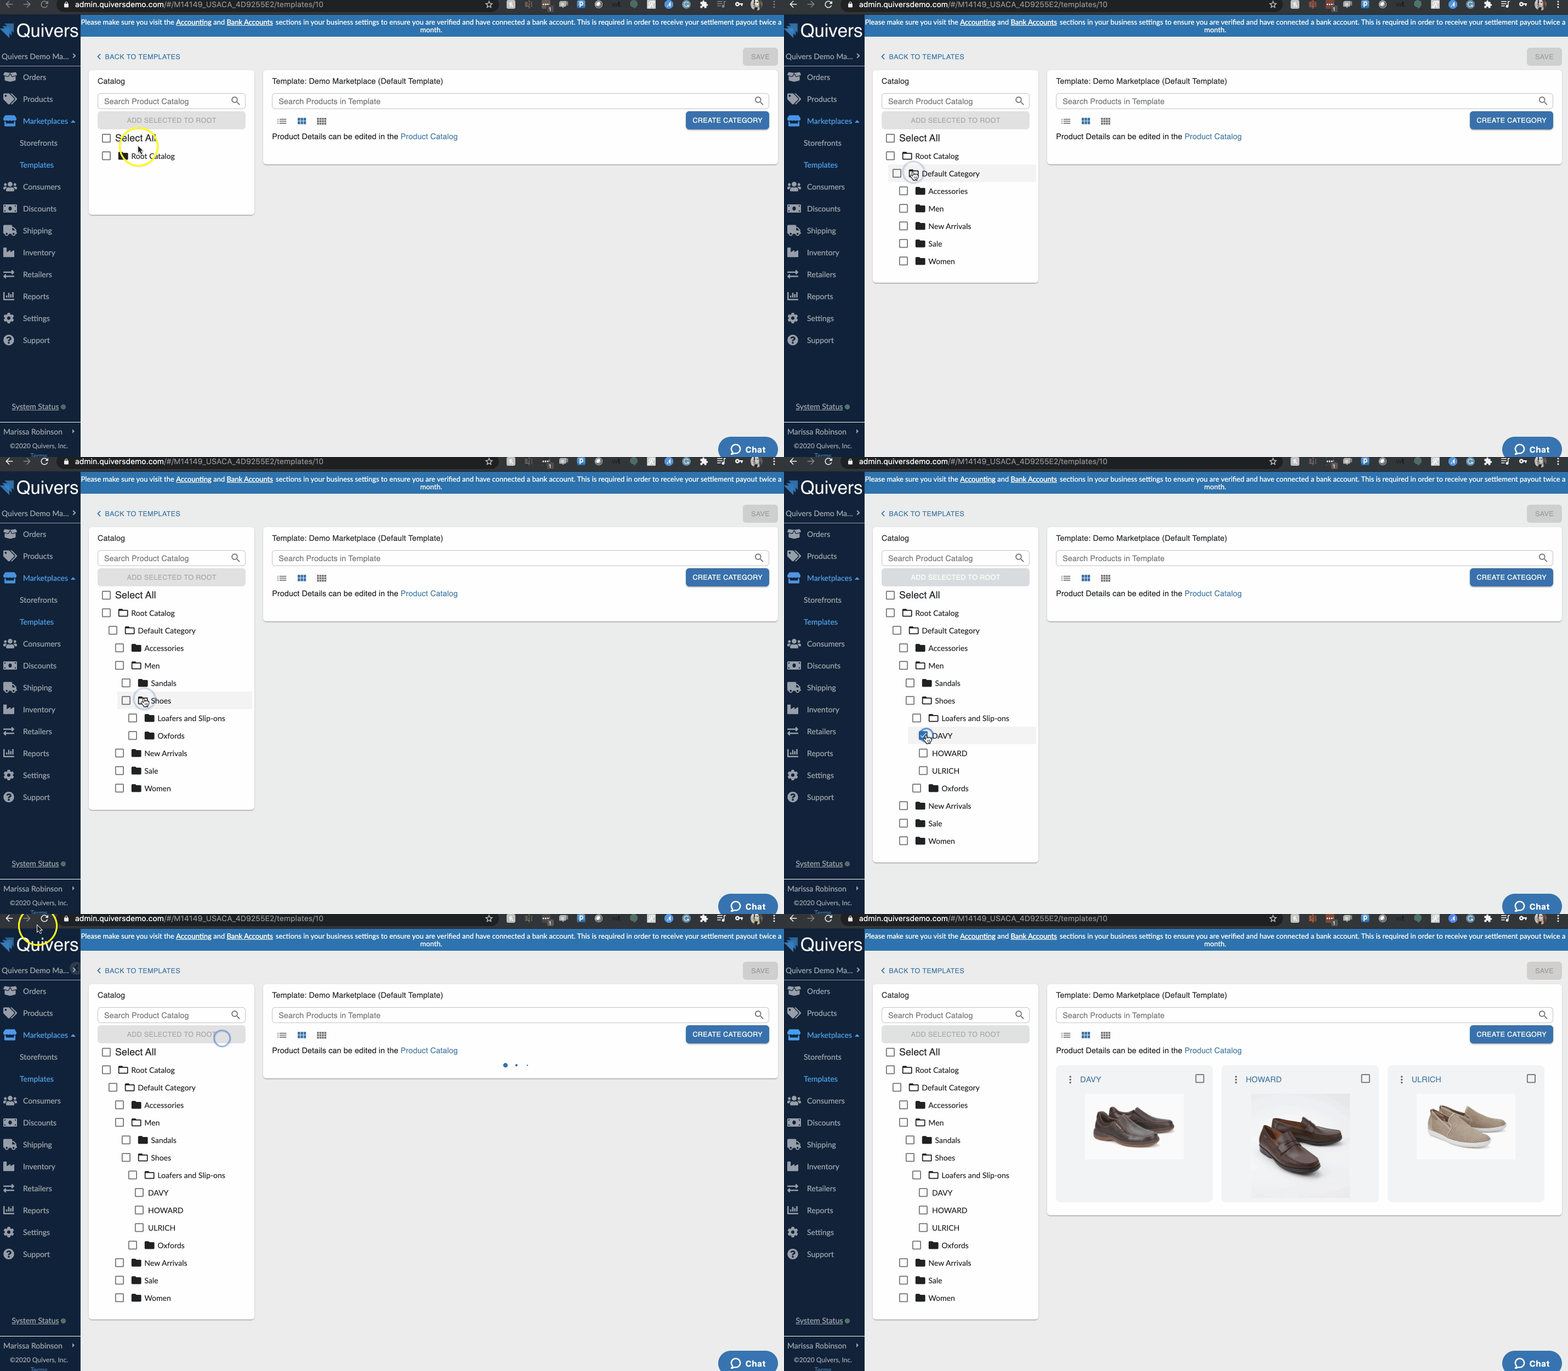
The left side of the template view will display your product catalog. A single click on a folder will expand to either subcategories or products.
4. Select the product(s) you wish to add to the template by selecting the checkbox on the left of each category or product name.
5. Once your products have been selected, select "Add Selected Products to Template" from right below the search bar in your product catalog side-bar.
6. The products will then display within the template on the right. *Helpful tip: click the product name to take you into the editor to make changes to the product.
*Make sure when adding products to the template, you are adding them to the folder or location within the template you want them to display.

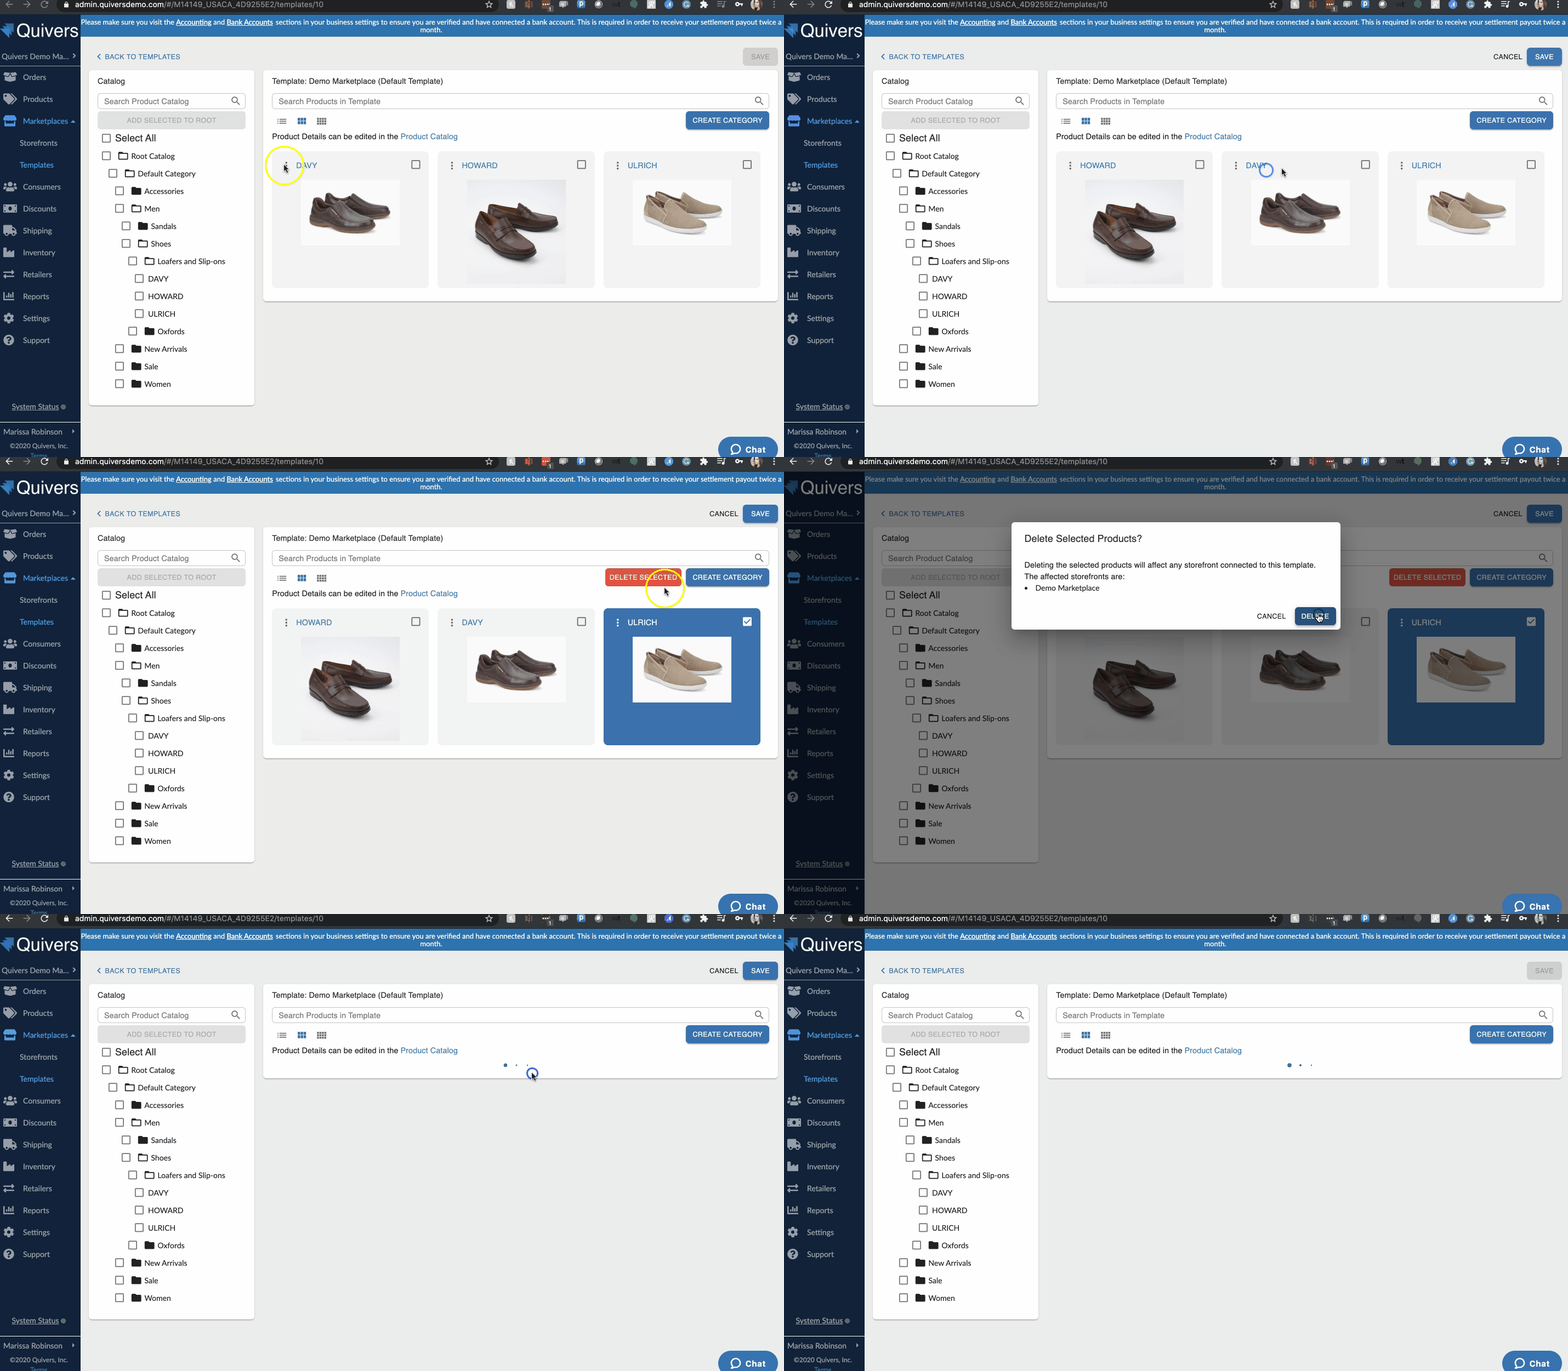
You can re-arrange the product positions by clicking the three dots in the top-left of each product and dragging to the desired location.
You can delete a product from the template by selecting the checkbox on the right of the product and selecting "Delete Selected" from the top right. A pop-up window will display to confirm that you wish to delete that product from all Storefronts associated with the template. *Helpful tip: to manage storefronts more easily, make one template that is applied to multiple storefronts!

