Uploading New Products and Updating Current Products
The Quivers Panel allows you to create and manage your products within the Products tab. If you need to make bulk changes or add many products, another option is to utilize the Quivers Catalog Import tool.
You can find a template and information about the fields within the template in our article "Import Template Guide".
The import tool provides a complete catalog export of everything currently in Quivers, and adjustments can be made to that data to be re-uploaded. New products can even be added to that data, which can then be uploaded via the import tool to update your catalog.
- You can find the import tool at https://catalog-import.quivers.com/
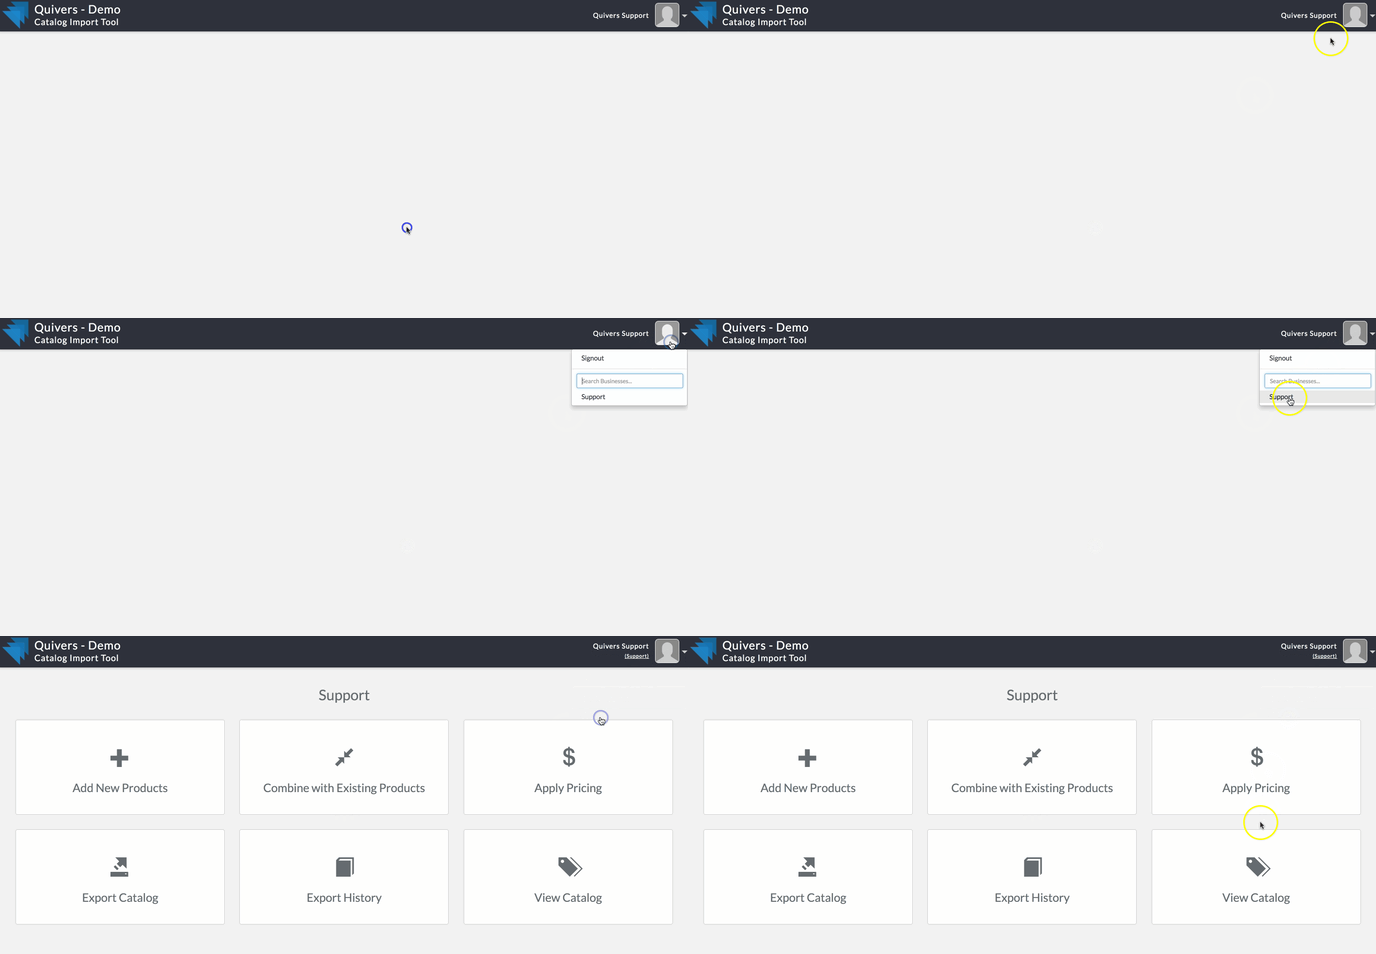
- Start by selecting your name in the top right-hand corner, where your business name will be displayed. Select your business from the list and once you do, options to manage your product catalog will display:

- Here is a breakdown of each option within the import tool:
Add New Products
This will allow you to upload a spreadsheet to import new products. New products can also be added in the "Combine with Existing Products" section. However, the "Add New Products" is purely for adding NEW data into Quivers.
NOTE: If a product already exists in Quivers and you would like to make updates to that data, "Add New Products" is NOT the selection to utilize. Please utilize "Combine with Existing Products".
Combine with Existing Products
This option allows you to make changes to your current product data and, as mentioned above, will also allow for new products to be created. To adjust the product data, you first need to get an export of your product catalog. Here are the steps:
- Select "Export Catalog," which will take you to the "Export History" tab where your catalog export will be generated

- Once the export is ready, a link will be available to click. Click the link to download a copy of your catalog. *Helpful Tip: you may need to refresh the Export History page to display the catalog export link.

The catalog export will look something like this:

The import fields you will need for the "Combine with Existing Products" import type are the first two columns, "Product. Id" and "Variant. Id". These are the identifying numbers assigned by Quivers when the product data is first uploaded.
These are necessary when "Combining with Existing Products" so the import tool knows which products already exist in Quivers. *If these fields are not included in your "Combine with Existing Products", new products will be created instead of updating current products.
Anything in this spreadsheet can be updated with the exception of the Product.Id and Variant.Id provided by Quivers. Products can NOT be deleted with the import tool. If a product needs to be deleted, that can be done from the Quivers Admin Panel.
If you are only building out new products, these can be added to the bottom of the exported spreadsheet and you do NOT need to populate the product.Id or variant.Id for the new products. That will happen once uploaded to Quivers. The data currently in the Quivers system can be your guide on how to populate the information.
For product images, you do not need to have numbers in front of the URLs as it displays in the export; if you do not have image URLS, you can upload the data without images using the import tool and then add images from the admin panel once the products have finished uploading.
Ready to import the product data?
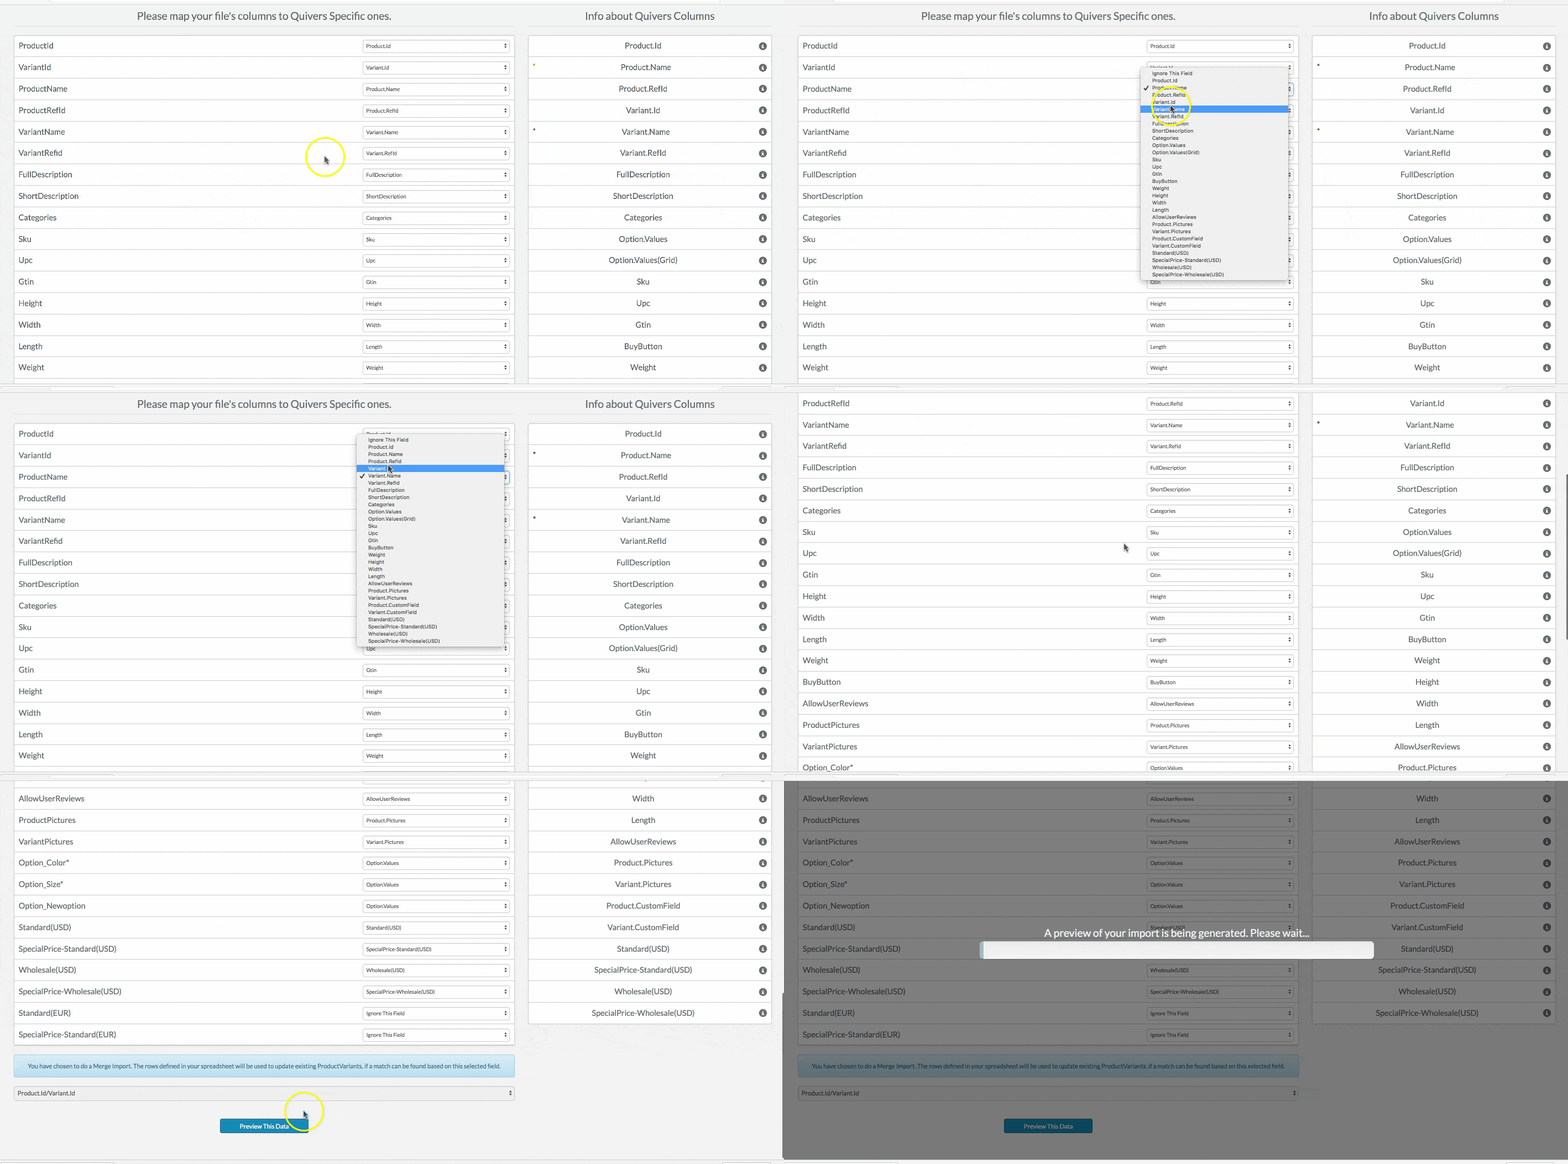
Select "Combine with Existing Products". This will allow you to select the spreadsheet. You will then be sent to a mapping screen which will try and map all the spreadsheet columns to the Quivers fields. This should automatically guess the correct mappings if you use the catalog tool's export.

The next step will provide a preview of what the data will look like once uploaded for a visual reference to the data included in the spreadsheet.

Here are some items to double-check before uploading your product data:
- Make sure all option names appear as you want the consumer to select from. For example, if you have a "Size" option, make sure the dropdown in the preview shows "Size" without any additional characters or letters.
- Make sure the product images in the spreadsheet are in the order you want them to display. The image which is shown in the preview will be the main image used for your products.
- Make sure all products group together as expected. For example, if you have products with an option, there will be multiple rows in your data for that product. If you see two files in the preview that should only be 1 product, there is something incorrectly configured in the spreadsheet.
- All options display under the correct option. If you select the dropdown and an option you are expecting to display there is not, there is likely something incorrectly configured in the spreadsheet.
Once ready, select Begin Import!
This will load the data from the spreadsheet into Quivers. It may take some time to load, but you can navigate away from the page, and the import will continue until it has been completed.
Apply Pricing
Apply pricing is the last import type which will only view the pricing columns in a spreadsheet and will only update the pricing values in the catalog. It will not update names, pictures, descriptions, etc.
Export Catalog
This will submit a request to export your catalog. Once your catalog export is ready, it will be located under the tab "Export History."
Export History
The export history tab is where all catalog exports ever requested will exist. This will keep track of previous data versions. We always recommend exporting a catalog before importing adjustments or adding new products.
View Catalog
View catalog will take you to your Quivers Admin Panel to view your products in the products tab.