
Before reading this article, you may want to view:
How to Create A Consumer Group
How to Associate a Marketplace to a Consumer Group
Custom Registration settings are only available to Private Storefronts (Marketplaces), which are Storefronts which have been associated with at least one Consumer Group. Once you have associated your Storefront with a Consumer Group, it is considered "Private." This means that Consumer Registration is disabled by default. Enabling "Custom Registration" allows the consumer to register to a particular Consumer Group associated with this Storefront using "Registration Codes." This allows them to have access to the Storefront.
Let's take a look at how this is enabled:
1. First, navigate to the Storefront where you would like to enable Custom Registration. Do this by expanding "Marketplaces" in the left-hand rail navigation and clicking on "Storefronts"
2. Next, click on the blue pencil icon to the right of the Storefront name that you would like to enable Custom Registration
3. You will need to click into the "Preview" functionality of the HoverCart within the Storefront and login into this particular Storefront by clicking on the "Login" button of the HoverCart ribbon
*Note: you must be an administrator to of the panel in order to access HoverCart settings
3. Once logged in, click "Settings" in the HoverCart ribbon, then click the "Registration" option in the left-hand rail of the HoverCart navigation
4. Here you must first Enable this functionality by clicking the blue "Disabled" button in the right-hand corner, and selecting "Enabled" from the dropdown
5. To set up your customer registration, select the Consumer Group you would like to assign registration codes:

6. Create a title for your Registration Term. The Term Name will be displayed within the HoverCart™ Registration Form, as the title of the field they must enter to register on this HoverCart

7. Next, determine how many times a specific Registration Code can be used

8. Then determine if you would like your Codes to be case sensitive by choosing Yes or No

9. If this field contains a valid RegEx pattern, then it will be possible for a consumer to register using any text which matches this RegEx pattern. The text they use will be added as a code. This RegEx pattern works in tandem with Entry Codes, so either can be used. The Maximum Term Use affects RegEx as well
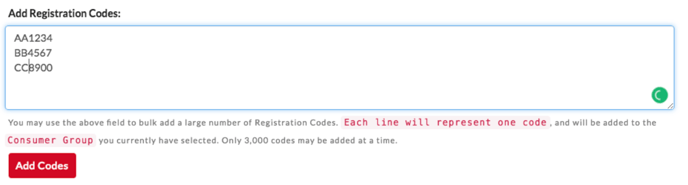
10. Enter your codes one by one or in bulk. Each line represents one code. Once you have added your codes, click on Add Codes to Save your codes.
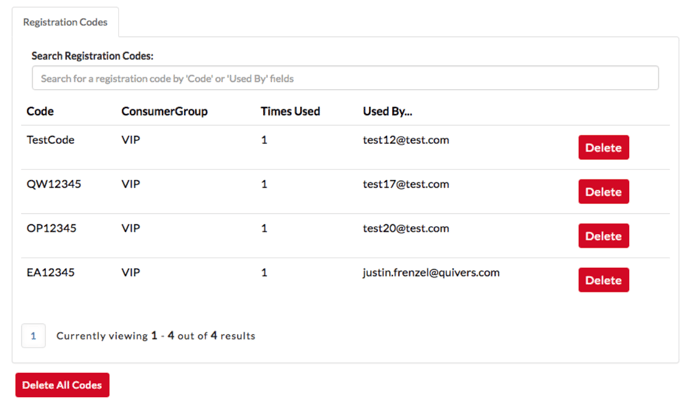
After you have uploaded your Registration codes, they will populate in the HoverCart and can be searched:
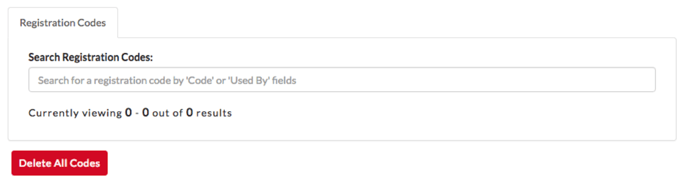
*Helpful Tip: You can delete Registration codes individually by clicking delete next to the line item or as a whole By clicking Delete All Codes
11. Lastly, the "Legacy Custom Register Form URL" field can be used to divert the user from the "Register" tab in the Login Form to a form of your choosing to register the customer